


Microneedling Depth Chart for Practitioners Clinic-Ready Ranges
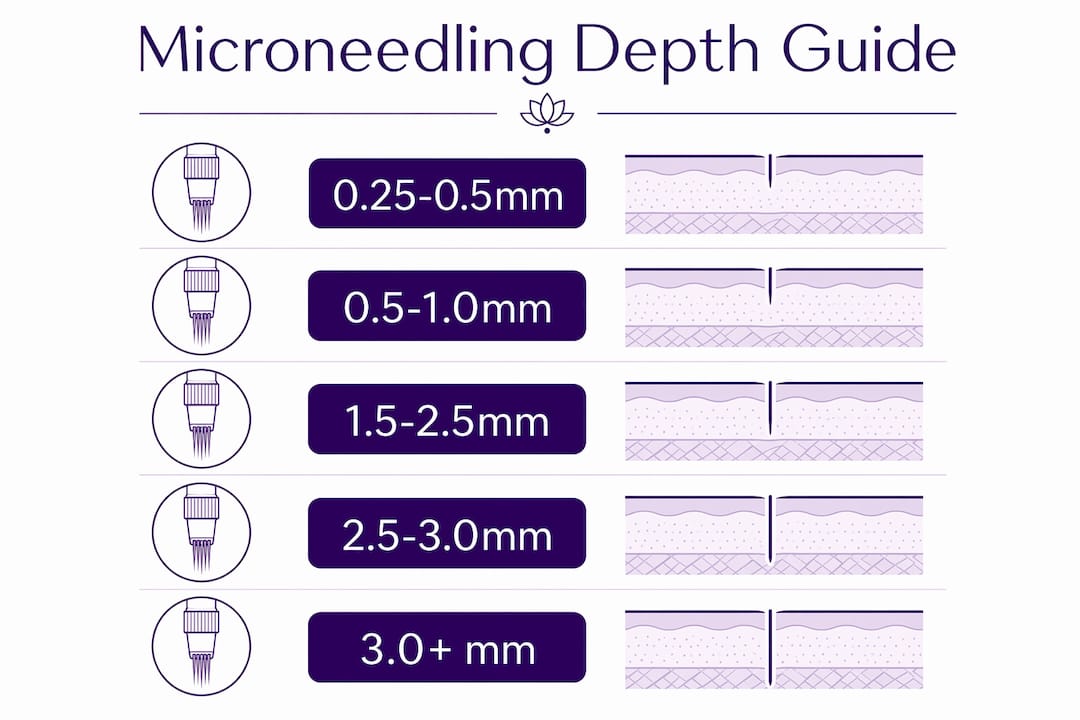
For most facial rejuvenation work, the practical microneedling depth chart breaks down like this: periocular and eyelid skin at 0.25–0.5 mm, forehead, neck, and décolletage at 0.5–1.0 mm, cheeks and jawline at 0.5–1.5 mm, atrophic acne scars on the cheeks at 1.5–2.5 mm, and deep tethered or body scars at 2.5–3.0 mm. For the upper lip, evidence supports a range of 0.5–1.0 mm, consistent with other thin perioral areas. The single rule-of-thumb that overrides any fixed number: target uniform pinpoint bleeding as your procedural endpoint, then escalate depth by 0.25–0.5 mm per session only after documented clinical response and confirmed tolerance. StatPearls confirms that periocular skin requires 0.25–0.5 mm while scarred cheeks and body areas typically need 1.5–2.5 mm for meaningful collagen induction. Pandoraaestheticsupply stocks the adjustable-depth electric derma pens and disposable cartridges that make hitting these site-specific targets consistent and reproducible across your clinic’s caseload.
Table of Contents
- The full microneedling depth chart: site-by-site clinical reference
- How microneedling creates collagen and why depth is the lever
- How to choose the right needle depth for each patient
- Safety limits, contraindications, and risk management by depth
- Procedure technique: passes, angles, and how to escalate across sessions
- Does pin count change what depth does? Understanding cartridge configuration
- What the evidence actually says about microneedling depth
- Post-procedure care stratified by needle depth
- Key Takeaways
- A practitioner’s honest take on depth decisions
- Professional microneedling devices and cartridges at Pandoraaestheticsupply
- Useful clinical sources and how to apply them
The full microneedling depth chart: site-by-site clinical reference
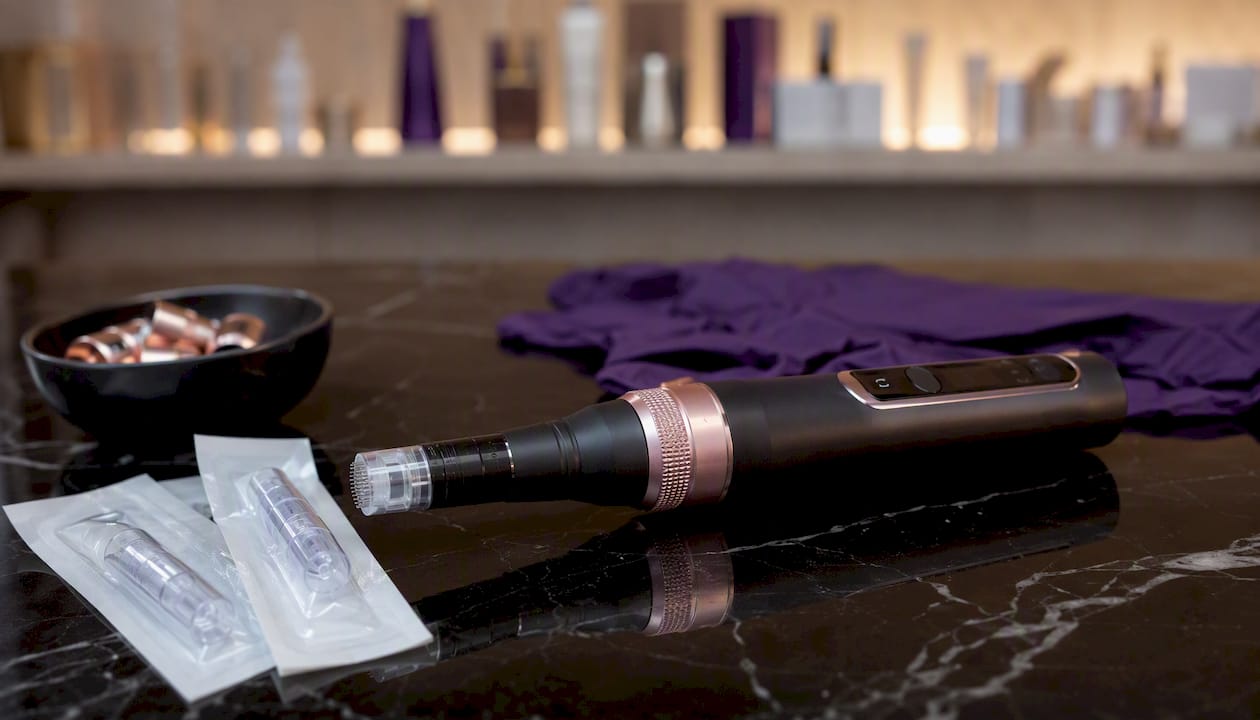
The table below consolidates evidence-aligned depth recommendations by anatomical site, clinical indication, and key procedural notes. Use it as a chairside quick reference.
| Anatomical Site | Clinical Indication | Recommended Depth (mm) | Key Notes |
|---|---|---|---|
| Forehead | Rejuvenation, fine lines | 0.5–1.0 | Thin skin; avoid bony prominences; 2–3 passes |
| Periorbital / eyelids | Periorbital rhytides | 0.25–0.5 | Extreme caution; no endpoint bleeding expected |
| Nasal bridge | Pore refinement | 0.25–0.5 | Thin skin over cartilage; 1–2 light passes |
| Cheeks | Rejuvenation, texture | 0.5–1.5 | Thicker dermis; good tolerance for escalation |
| Perioral / upper lip | Perioral lines | 0.5–1.0 | Sensitive; limit passes; monitor closely |
| Chin | Rhytides, texture | 0.5–1.0 | Moderate thickness; standard protocol |
| Jawline | Laxity, texture | 0.5–1.5 | Can escalate for fibrotic tissue |
| Neck | Laxity, crepiness | 0.5–1.0 | Thin skin; conservative depth always |
| Décolletage | Photoaging, texture | 0.5–1.0 | Large area; roller efficient; monitor erythema |
| Atrophic acne scars (cheeks) | Scar remodeling | 1.5–2.5 | Endpoint bleeding expected; 4–6 sessions |
| Hypertrophic / raised scars | Scar softening | 0.5–1.0 | Deeper may worsen; start conservative |
| Stretch marks / striae | Texture, pigment | 1.5–2.0 | Multiple sessions; combine with topicals |
| Deep tethered / body scars | Severe scar remodeling | 2.5–3.0 | Expert hands only; physician oversight |
| Décolletage (body) | Rejuvenation | 0.5–1.0 | Roller appropriate for surface area |
A few site-specific points worth flagging:
- Periorbital zone: Never chase a bleeding endpoint here. The skin is 0.4–0.6 mm thick and the target is purely epidermal stimulation.
- Neck and décolletage: Skin is thin and photodamaged; 1.0 mm is a practical ceiling for most patients.
- Atrophic cheek scars: This is where depth earns its keep. A split-face trial showed 2.5 mm produced significantly greater scar improvement than 1.5 mm after six sessions (P = 0.02).
- Body scars: Depths above 2.5 mm should only be used in a medically supervised setting with appropriate anesthesia.
Pro Tip:When treating multiple zones in a single session, map your depth settings before you begin. Start with the shallowest zone (periorbital), finish with the deepest (scar tissue), and document each setting in the chart before moving to the next area.
How microneedling creates collagen and why depth is the lever
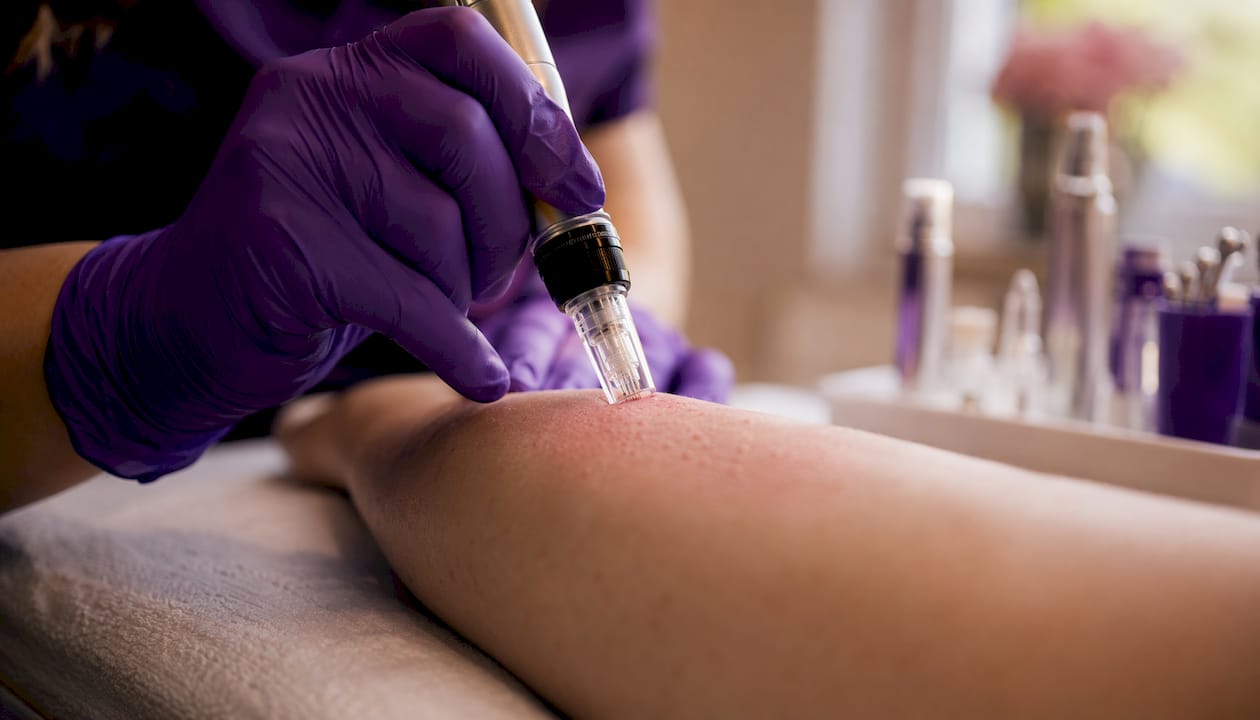
Microneedling is controlled dermal injury. The needles create micro-channels that trigger a wound-healing cascade, and the depth you choose determines which tissue layer you’re injuring and therefore which biological response you get.
The sequence runs like this: within roughly five days of treatment, a fibronectin matrix forms at the injury site. That matrix scaffolds new collagen III deposition, which can persist for five to seven years in some histologic studies. At the six-month mark after four sessions with 1.5 mm needles, histologic examination has shown a 400% increase in collagen and elastin deposition. That’s not a surface-level result.
The anatomical math matters here. Facial epidermis averages 0.05–0.1 mm thick, with the periorbital zone at the thinner end and the cheeks slightly thicker. A 1.5 mm needle on the cheek typically reaches the mid-dermis, which is an effective target for neocollagenesis in rejuvenation protocols. Go shallower and you’re working the papillary dermis, which is appropriate for product absorption and superficial texture. Go deeper and you’re targeting the reticular dermis and scar tissue architecture.
Clinical effects by depth, in brief:
- 0.25–0.5 mm: Epidermal stimulation, enhanced transdermal delivery of topicals, minimal downtime
- 0.5–1.0 mm: Papillary dermis stimulation, collagen induction for fine lines and photoaging
- 1.0–1.5 mm: Mid-dermis targeting, meaningful neocollagenesis, standard rejuvenation protocol
- 1.5–2.5 mm: Reticular dermis and scar tissue remodeling, atrophic scar treatment
- 2.5–3.0 mm: Deep scar architecture, body scars, physician-supervised setting only
How to choose the right needle depth for each patient
The mm number on your device dial is a starting point, not a prescription. Six factors should shape every depth decision you make.
The six factors to assess before setting depth:
- Skin thickness and anatomical site — periorbital and neck skin demands conservative depths; cheeks and body areas tolerate more.
- Fitzpatrick phototype — Fitzpatrick IV–VI carries elevated post-inflammatory hyperpigmentation (PIH) risk at deeper settings; start 0.25–0.5 mm shallower than your default and escalate only after confirmed tolerance.
- Scar type and depth — atrophic scars need reticular dermis access (1.5–2.5 mm); hypertrophic scars often respond better to shallower passes.
- Treatment goal — transdermal delivery needs only 0.25–0.5 mm; scar remodeling needs 1.5 mm minimum.
- Device type and pin count — pen devices offer adjustable depth and speed that rollers can’t match for complex facial areas.
- Prior treatment response and documented tolerance — never escalate without reviewing the previous session’s endpoint and recovery notes.
Stepwise clinical workflow:
- Assess anatomy and Fitzpatrick type at consultation.
- Set a conservative starting depth based on the site chart above.
- Perform a test patch on a small area if the patient is new or the indication is unfamiliar.
- Treat to endpoint (pinpoint bleeding or mild erythema for superficial settings), not to a fixed pass count.
- Document depth, pin count, speed, passes, endpoint, and anesthetic used immediately after treatment.
- Review at the next appointment before escalating depth.
Documentation fields to record in every chart entry: depth (mm), pin count, speed setting, number of passes per axis, endpoint observed, anesthetic used and timing, immediate aftercare applied, and patient-reported comfort score.
Pro Tip:For Fitzpatrick IV–VI, apply a tyrosinase inhibitor (such as a kojic acid or niacinamide serum) in the weeks before treatment and plan a conservative first session at 0.5–0.75 mm below your standard depth for the indication. PIH is far easier to prevent than to treat.
Safety limits, contraindications, and risk management by depth
The core safety rule: for routine facial practice, stay at or below 3.0 mm and escalate conservatively. Depths above 2.5 mm on the face carry real risk of subcutaneous penetration in thin-skinned zones and should only be used in a medically supervised setting.
Absolute and relative contraindications:
- Active skin infection, open wounds, or herpes simplex outbreak in the treatment zone
- Isotretinoin use within the past six months (minimum; some protocols extend to twelve months)
- Uncontrolled systemic disease (diabetes, autoimmune conditions affecting wound healing)
- Active keloid formation or history of keloid scarring in the treatment area
- Pregnancy (defer to local US regulations and your clinic’s medical oversight policy)
- Unrealistic patient expectations or inability to follow aftercare protocols
- Blood-thinning medications (relative contraindication; assess case by case with physician input)
Risk management by depth:
- PIH prevention: Use conservative depth for Fitzpatrick IV–VI, avoid sun-exposed skin without adequate SPF preparation, and plan sessions outside peak UV months where possible.
- Infection control: Single-use sterile cartridges only. No reuse. Disinfect device body between patients per manufacturer protocol.
- Informed consent: Deeper sessions (above 1.5 mm) warrant explicit consent covering downtime, PIH risk, infection risk, and the possibility of prolonged erythema.
- When to refer: Any sign of infection post-treatment, PIH that does not resolve within eight weeks, or patient request for depths above 2.5 mm on the face should involve physician oversight.
| Depth Range | Primary Risk Concerns |
|---|---|
| 0.25–0.5 mm | Minimal; mild erythema, rare irritation |
| 0.5–1.0 mm | Transient erythema, minor bleeding, low PIH risk |
| 1.0–1.5 mm | Moderate erythema, PIH risk in Fitzpatrick IV–VI, infection if sterility lapses |
| 1.5–2.5 mm | Prolonged downtime, elevated PIH risk, bleeding, requires anesthesia |
| 2.5–3.0 mm | Subcutaneous penetration risk, significant bleeding, physician oversight required |
Pro Tip:For any session above 1.5 mm, apply a self-occluding topical anesthetic mixture (such as 7% lidocaine + 7% tetracaine) for 30–60 minutes before treatment. This approach limits systemic absorption risk compared with non-occluded, higher-concentration formulations while providing adequate analgesia for deeper passes.
Procedure technique: passes, angles, and how to escalate across sessions
Three to four soft perpendicular passes in a crisscross pattern per area, until uniform pinpoint bleeding appears, is the evidence-backed procedural standard. That endpoint is more reliable than any fixed mm target.
Technique specifics:
- Angle: Hold the pen perpendicular to the skin surface. Angling the device reduces effective penetration depth and creates inconsistent channel depth.
- Pressure: Light, consistent pressure. Pressing harder does not increase effective depth on a calibrated pen device; it increases trauma and inconsistency.
- Speed: Higher speed settings on electric pen devices work well for thicker, more fibrotic skin. Reduce speed for thin skin (periorbital, neck) to maintain control.
- Passes: Three to four passes per axis in a crisscross pattern. After achieving the endpoint, apply ice-water–soaked sterile gauze for hemostasis before moving to the next zone.
- Thin skin zones: Reduce speed, reduce depth by 0.25 mm from your planned setting, and limit to two to three passes. The endpoint in periorbital skin is mild erythema, not bleeding.
- Fibrotic scar tissue: May require an additional pass to achieve endpoint due to increased tissue resistance. Do not increase depth mid-session without reassessing.
Sample documentation template:
- Patient ID and session number
- Treatment date and treating practitioner
- Anatomical zones treated
- Depth setting per zone (mm)
- Pin count / cartridge type
- Speed setting
- Number of passes per axis per zone
- Endpoint observed (pinpoint bleeding / erythema / none)
- Anesthetic used, concentration, and application time
- Immediate aftercare applied (barrier cream, growth factor serum, etc.)
- Patient comfort score (0–10)
- Planned depth for next session
When to escalate depth across sessions: Wait for clinical response (visible texture or scar improvement), absence of adverse effects, and a documented endpoint at the current setting. The standard increment is 0.25–0.5 mm per session. Never escalate at the same appointment where you first achieve a clean endpoint.
Pro Tip:If a patient reports minimal discomfort and you see no endpoint after four passes at your planned depth, check your cartridge. A worn or improperly seated needle can reduce effective penetration by 0.25–0.5 mm. Replace the cartridge before increasing the depth setting.
Does pin count change what depth does? Understanding cartridge configuration
Pin count and depth are separate variables. Confusing them is one of the most common calibration errors in clinical practice.
The core distinction: Needle density (pin count) affects coverage area, comfort, and channel distribution. Depth controls which dermal layer you reach. A 36-pin cartridge at 0.5 mm does not penetrate deeper than a 12-pin cartridge at 0.5 mm. What it does is distribute that stimulation across more channels per pass, which affects comfort and coverage efficiency.
| Strategy | Pin Count | Depth | Best For |
|---|---|---|---|
| High-density, shallow | 36-pin | 0.25–0.75 mm | Transdermal delivery, superficial rejuvenation, large areas |
| High-density, moderate | 36-pin | 1.0–1.5 mm | General facial rejuvenation, texture, fine lines |
| Low-density, deep | 12–16 pin | 1.5–2.5 mm | Focused scar remodeling, atrophic scars, fibrotic tissue |
| Low-density, shallow | 12–16 pin | 0.25–0.5 mm | Periorbital, perioral, small complex areas |
Practical calibration notes:
- Check cartridge gauge and skip length specifications when switching between cartridge types. A 30 G needle and a 32 G needle at the same depth setting will produce slightly different channel profiles and comfort levels.
- Perform a test patch on a low-risk area (inner arm or behind the ear) when using a new cartridge configuration on a patient for the first time.
- Needle gauges for scar treatment typically run 30–32 G, with cartridge arrays ranging from 12 to 36 pins depending on device model.
On the “16-pin vs. 36-pin” question: Neither is universally better. A 16-pin cartridge concentrates energy density, making it more appropriate for focused scar remodeling where you want deeper, more discrete channels. A 36-pin cartridge distributes stimulation more evenly, which suits large-area rejuvenation and transdermal delivery protocols. Match the cartridge to the indication, not to a preference. The Dr. Pen collection at Pandoraaestheticsupply includes multiple cartridge configurations specifically for this reason.
What the evidence actually says about microneedling depth
The depth ranges in clinical practice are not arbitrary. They come from a body of evidence that, while still growing, gives practitioners enough to work with confidently.
Core evidence summary:
| Source | Key Finding | Clinical Application |
|---|---|---|
| StatPearls / NCBI | Periocular 0.25–0.5 mm; scarred areas 1.5–2.5 mm | Site-specific depth selection |
| PubMed split-face trial | 2.5 mm > 1.5 mm for atrophic scars (P = 0.02, 6 sessions) | Justifies deeper escalation for acne scars |
| StatPearls / NCBI | 400% collagen/elastin increase at 6 months with 1.5 mm, 4 sessions | Efficacy benchmark for rejuvenation protocols |
| ResearchGate review | 0.5–1.0 mm for aging; 1.5–2.0 mm for scars; up to 3.0 mm for severe cases | Upper-depth norms and escalation ceiling |
| JDDonline review | Pinpoint bleeding endpoint; 3–4 passes; 7% lidocaine + 7% tetracaine for deep sessions | Procedural and anesthesia standards |
Practitioner caveats on the evidence: Most microneedling studies involve small samples and heterogeneous devices, which makes direct comparison difficult. The split-face scar study is one of the cleaner pieces of evidence for depth-specific outcomes, but six sessions is a significant treatment course. When translating literature values to clinic practice, apply the published depth as a ceiling for your first session, not a starting point.
When does evidence support combining modalities? PRP and vitamins A and C applied immediately post-needling have clinical support for amplifying collagen response. RF microneedling adds thermal energy to the mechanical stimulus, which is particularly relevant for deeper remodeling where standard needling alone may not achieve sufficient dermal heating. The RF microneedling machine options at Pandoraaestheticsupply are worth reviewing if your clinic is moving toward combined-energy protocols.
Post-procedure care stratified by needle depth
Deeper treatments mean more downtime and higher risk of PIH and infection. Aftercare should scale with depth, not be applied as a one-size protocol.
Depth-stratified aftercare:
- 0.25–0.5 mm: Mineral SPF 30+ immediately post-treatment, gentle hydrating serum (hyaluronic acid), no active ingredients for 24 hours. Patients can return to work the same day.
- 0.5–1.0 mm: Occlusive barrier (petrolatum or medical-grade barrier cream) for the first 12–24 hours, gentle cleanser only, no retinoids or AHAs for five to seven days. Mild erythema resolves within 24–48 hours for most patients.
- 1.0–1.5 mm: Occlusive barrier for 24–48 hours, delayed active topicals until day seven, strict sun avoidance for two weeks. Erythema may persist 48–72 hours; some crusting is normal.
- Above 2.0 mm: Physician-level wound care protocol, extended surveillance for infection, no active topicals for ten to fourteen days, and mandatory SPF use for a minimum of four weeks. Erythema and crusting can persist beyond 72 hours.
| Depth Range | Expected Erythema | Crusting | Return to Work |
|---|---|---|---|
| 0.25–0.5 mm | Mild, resolves in hours | None | Same day |
| 0.5–1.0 mm | Moderate, 24–48 hours | Rare | 1–2 days |
| 1.0–1.5 mm | Moderate to significant, 48–72 hours | Possible | 2–3 days |
| 1.5–2.5 mm | Significant, 3–5 days | Likely | 4–5 days |
| 2.5–3.0 mm | Prolonged, 5–7+ days | Expected | 5–7 days |
Troubleshooting:
- Prolonged erythema (beyond expected window): Rule out contact dermatitis from post-treatment products. Switch to a fragrance-free barrier and reassess at 48 hours.
- Infection suspicion: Any purulent discharge, spreading erythema, or fever warrants immediate physician referral. Do not treat empirically with over-the-counter products.
- PIH management: Start a tyrosinase inhibitor at week two if pigment changes appear. Refer to a dermatologist if PIH does not respond within eight weeks.
Key Takeaways
Depth selection in microneedling is a clinical decision driven by anatomy, indication, and documented patient response — not a default dial setting.
| Point | Details |
|---|---|
| Site-specific depth ranges | Periocular 0.25–0.5 mm; cheeks/scars 1.5–2.5 mm; body scars up to 3.0 mm. |
| Endpoint over mm | Target uniform pinpoint bleeding across 3–4 perpendicular passes; this is more reliable than a fixed depth number. |
| Escalate conservatively | Increase depth by 0.25–0.5 mm per session only after documented clinical response and confirmed tolerance. |
| Fitzpatrick IV–VI safety | Start 0.25–0.5 mm shallower than standard; use a tyrosinase inhibitor pre-treatment to reduce PIH risk. |
| Pandoraaestheticsupply devices | Adjustable-depth Dr. Pen systems and multi-configuration cartridges support consistent site-specific depth control across clinic protocols. |
A practitioner’s honest take on depth decisions
One of the most common decision points in clinic is the 1.5 mm vs. 2.5 mm question for atrophic cheek scars. The split-face evidence is clear that 2.5 mm produces better outcomes, but the evidence also assumes six sessions and a patient who tolerates progressive escalation well. What the literature doesn’t tell you is how to handle the patient who presents with Fitzpatrick IV skin, moderate ice-pick scarring, and a history of PIH from a previous treatment at another clinic.
The answer isn’t to default to 1.5 mm and call it conservative. It’s to start at 1.5 mm, document the endpoint and recovery meticulously, and earn the right to escalate by session three or four. Depth is not a badge of clinical confidence. It’s a parameter you adjust based on what the tissue tells you.
Device selection matters here too. A calibrated electric pen with adjustable speed and depth, like the systems available through Pandoraaestheticsupply, gives you the precision to make 0.25 mm increments meaningful. A roller doesn’t. Clinic protocols in the US should follow applicable state regulations and medical oversight requirements for the depth ranges you’re working in. For sessions above 1.5 mm, physician involvement in the protocol is the standard most state boards expect.
Professional microneedling devices and cartridges at Pandoraaestheticsupply
Consistent depth control starts with the right device. Pandoraaestheticsupply stocks professional-grade microneedling systems built for the precision this kind of site-specific work demands, without the overhead of sourcing from multiple suppliers.

The Dr. Pen A10 electric derma pen gives you fine-grained depth adjustment for complex facial zones, while the Dr. Pen Ultima A6 handles higher-throughput scar-focused sessions with consistent needle penetration. For clinics adding energy-assisted remodeling to their protocols, the RF microneedling machine covers deeper collagen remodeling indications. Disposable cartridges in 12-pin, 16-pin, and 36-pin configurations are stocked alongside topical numbing options to support anesthesia protocols for deeper sessions. Browse the full range of aesthetic devices and machinery at Pandoraaestheticsupply and configure your clinic’s microneedling setup from a single professional source.
This article is general clinical information, not medical advice. Practitioners should confirm current depth protocols and regulatory requirements with their state board and supervising physician for their specific practice setting.
Useful clinical sources and how to apply them
The depth recommendations in this article draw from a short list of high-quality sources. Here’s how to weight each one in practice.
StatPearls / NCBI Bookshelf — Microneedling: The most accessible high-level review of microneedling mechanism, depth-to-dermis rationale, and site-specific ranges. Use it as your foundational reference for patient education and protocol justification. Updated periodically; check for the current version before citing in formal documentation.
PubMed — Split-face atrophic acne scar study: The strongest direct evidence for depth-specific scar outcomes (2.5 mm vs. 1.5 mm, six sessions, P = 0.02). Small sample size limits generalizability, but the directional finding is consistent with clinical experience. Apply it as a ceiling-setting reference for scar escalation protocols, not as a universal prescription.
JDDonline — Microneedling for acne scars: Practical procedural guidance on endpoint, anesthesia, and technique. The 7% lidocaine + 7% tetracaine recommendation and the 3–4 pass crisscross standard come from here. High clinical utility; treat it as a technique reference rather than an outcomes study.
ResearchGate — Microneedling: A Review and Practical Guide: Covers needle gauge, cartridge configuration, and upper-depth norms (up to 3.0 mm for severe scars). Useful for device selection and setting escalation ceilings. Weight it as a practical guide, not a primary trial.
-
Wiley — Current concepts on how to optimize skin needling: Covers adjuvant therapy combinations and session interval considerations. Treat as expert opinion and personal-experience literature rather than controlled trial evidence. Useful for building combined-modality protocols.
Microneedling Depth Chart for Practitioners Clinic-Ready Ranges